
Reviewed · KYOTO CRAFT & CALLIGRAPHY WORKSHOPS
Natural Indigo Dyeing with Local Masters (Private Atelier)
Blue starts as green here. In Kyoto, this workshop lets you work with natural fermented indigo (sukumo) in a real 300-year-old studio, not a made-for-tourist setup. Two things I love: the hands-on dyeing with careful help from artisans, and the small-group feel that keeps the process calm and personal. One possible drawback is that you dye only a single included cloth item, so this isn’t a full-wardrobe dye day.
You also get more than technique. You’ll hear context for indigo in daily life, sip indigo leaf tea, and get bilingual cultural support from your Kyoto host (with translators such as Chie and Sakura playing a big role in the experience). It’s a first-time setup that opens the workshop doors to international guests.
Plan your outfit accordingly. The studio is traditional with wooden floors, and you should wear casual clothes you don’t mind getting stained, even with aprons and protections provided.
In This Review
- Key highlights at a glance
- Why Kyoto Indigo Feels Like the Real Thing
- Inside the 300-Year-Old Indigo Studio in Western Kyoto
- Your Dyeable Creation: Furoshiki Included, Upgrades on the Day
- Natural Indigo in Plain Terms: Sukumo, Folding, and Oxidation
- The 2-Hour Itinerary That Actually Matters
- Welcome and studio tour (about 15 minutes)
- Indigo dyeing workshop (about 60 minutes)
- Tea and closing reflection (about 15–20 minutes)
- Hands-On Help: What You Get From Artisans and Translators
- Value for $95: What You’re Really Paying For
- What to Wear and Bring So You Don’t Stress
- Who This Indigo Workshop Fits Best
- Should You Book This Natural Indigo Private Atelier?
- FAQ
- How long is the natural indigo dyeing experience?
- What’s included in the $95 price?
- What can I dye, and can I upgrade?
- Is there shipping for my dyed item?
- What should I wear or bring?
- Is the workshop wheelchair accessible?
- What languages are used during the workshop?
Key highlights at a glance
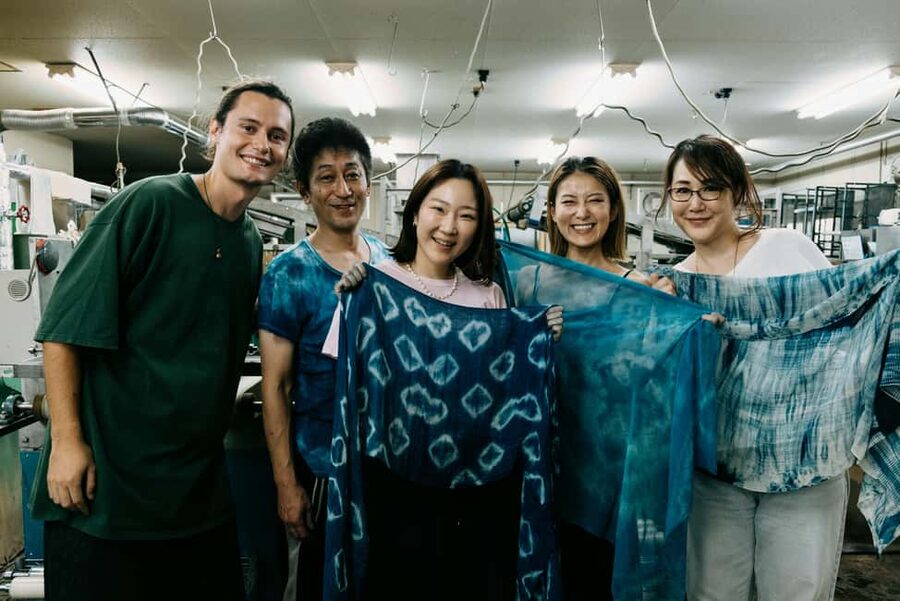
- A real working indigo dye studio with historic tools and large vats used for indigo work
- Natural fermented indigo vats (sukumo), no chemical shortcuts
- Small group size (max 6) so you get step-by-step help while you fold, bind, and dip
- One take-home cotton item included, with scarf or wool/silk upgrade options on the day
- Bilingual guidance (English/Japanese) plus cultural stories from your host
- Calm closing with indigo leaf tea and time to admire your finished piece
Why Kyoto Indigo Feels Like the Real Thing
If you’ve ever seen indigo photos online, you’ve probably noticed how blue looks almost solid. The surprise here is that the dye doesn’t start blue at all. You dip in indigo that turns the cloth from green tones toward deep blue as the dye oxidizes. That simple fact changes how you understand the craft. You stop thinking of it as magic and start seeing it as patience plus chemistry plus timing.
The bigger reason I’d pick this over a generic craft class is the setting. This is hosted inside an authentic historic indigo studio, described as a genuine working space with a 300-year-old character. You’re not learning “a version” of aizome. You’re learning the kind of workflow artisans use when they’re making things they care about.
The other “why it’s worth it” factor is the group size. With a maximum of 6 participants, you’re not rushed, and you’re less likely to end up standing around waiting your turn. In a process like this, that matters. Folding correctly and dipping consistently isn’t just about making art; it’s about getting a result you’re proud to take home.
Make something by hand in a Kyoto workshop
Inside the 300-Year-Old Indigo Studio in Western Kyoto
The workshop takes place in a quiet western Kyoto area, in a studio reached by train and a walk from Kyoto Station (about 30 minutes total, plus walking). The exact address is provided after booking, which also hints that the location isn’t built for foot-traffic.
Inside, you’ll notice it’s still a working space. You’re guided through what’s used—tools, vats, and how the studio operates. One practical thing to expect: it’s a traditional room with wooden floorboards. That means you’ll want comfortable shoes and a steady stance. Also, there’s no mention of a change room, so choose clothes wisely.
You’ll also get a studio tour component before dyeing proper. This isn’t filler. It sets you up to understand what you’re seeing once you’re standing by the vats. The experience has a cultural host who explains the symbolism of indigo and how it fits daily life. And because there’s bilingual support, you’re not left to guess what the artisans are saying as they move through the process.
Your Dyeable Creation: Furoshiki Included, Upgrades on the Day
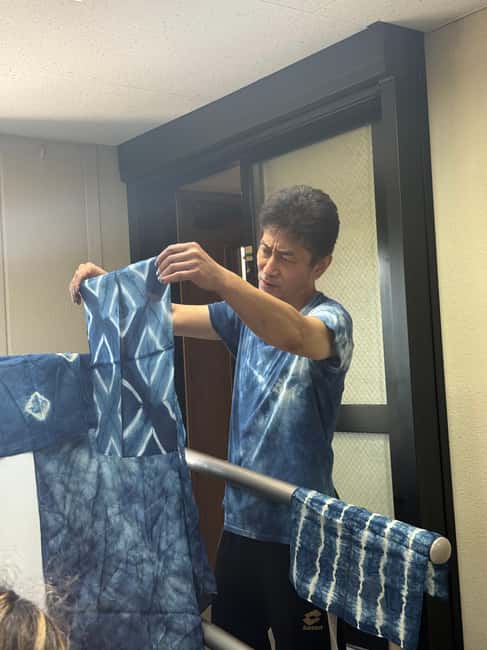
The workshop fee includes one dyeable cotton cloth, described as a cotton furoshiki around 45–50 cm. Depending on what’s available on the day, the included item may align with traditional cotton pieces like a tenugui-style cloth or related handkerchief format. The key practical point: you’ll dye one textile item as part of the base price.
Then there are upgrade options you can pay for on-site. The choices mentioned include:
- Cotton scarf (lightweight, wearable year-round)
- Silk scarf (luxurious texture and deeper tones)
- Wool stole (using Mongolia’s finest quality wool)
If you’re deciding what to dye, think about where you’ll actually use the finished piece. A small cotton item is perfect if you want something easy to display or gift. A scarf or stole costs extra but gives you more fabric area to enjoy the final indigo shades.
Also, there’s no large garment dyeing included. This is one piece, made carefully. If you’re hoping to dye a big garment, plan on choosing another workshop or arranging other services separately, since the data here clearly limits what’s included.
Natural Indigo in Plain Terms: Sukumo, Folding, and Oxidation
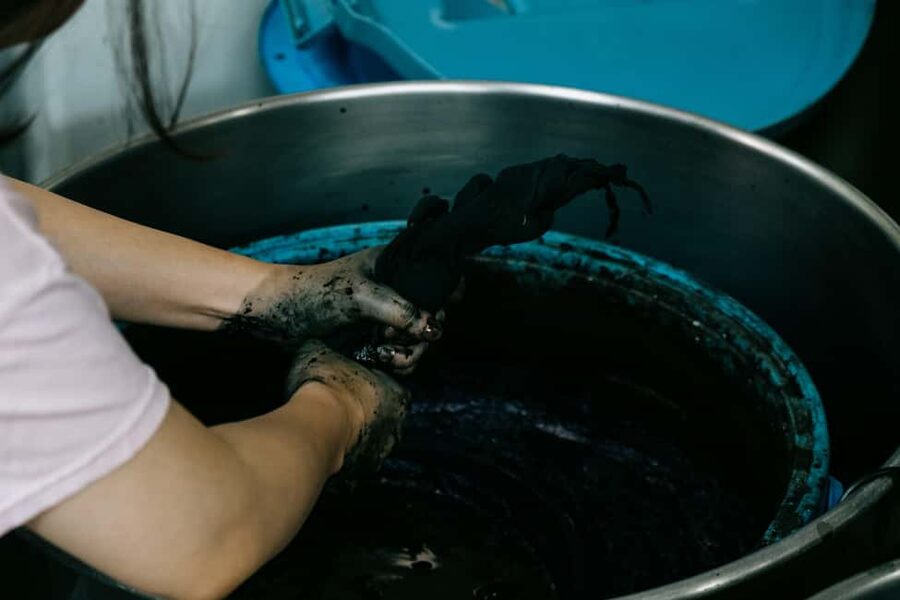
Aizome (natural indigo dyeing) uses fermentation-based indigo vats. Here, the studio uses sukumo, the fermented indigo method. You’ll see the vats up close, and you’ll learn how the cloth changes as it’s dipped and exposed to air.
Your hands are part of the process. Typically, you’ll follow a step-by-step flow that includes:
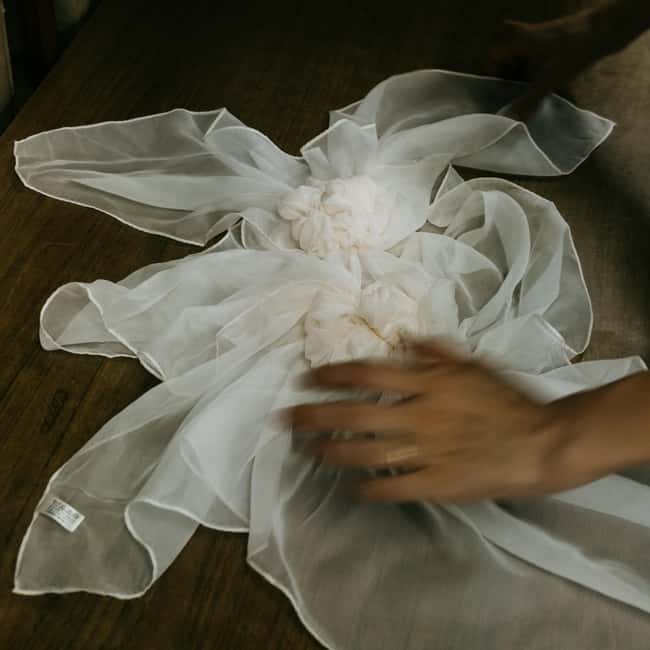
- Folding your cloth using traditional approaches
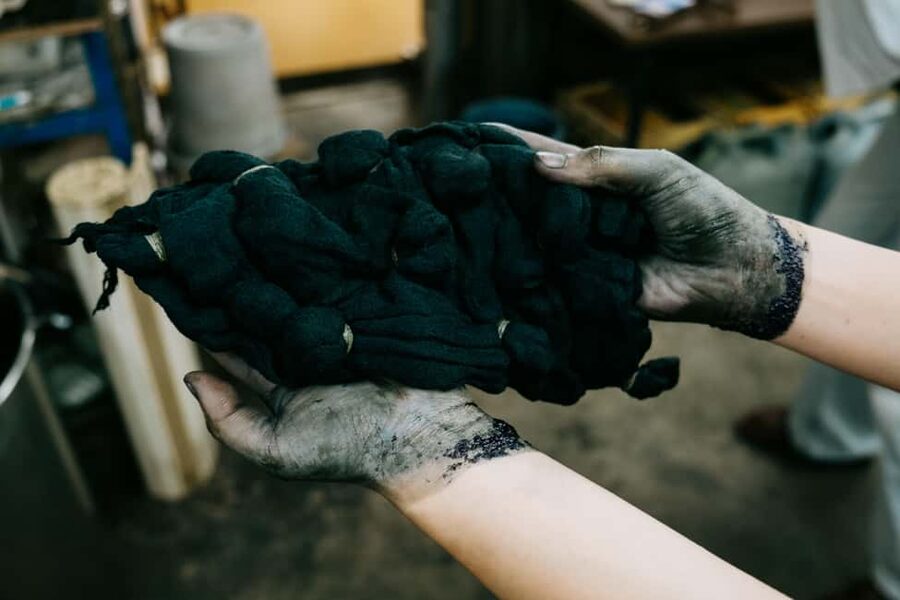
- Binding it so it resists dye in certain areas
- Dipping it into the indigo vats
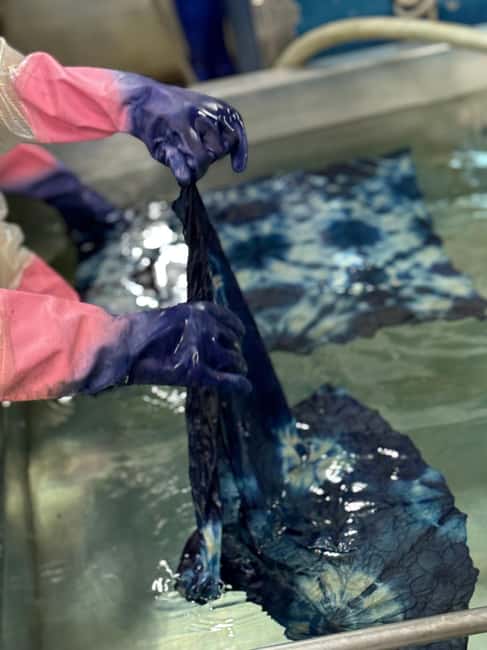
- Watching color shift from green toward deep blue through oxidation
That color shift is why people get hooked on indigo. It’s not instant. The change is gradual and tied to timing. The artisans guide you through how to dip and handle your piece so you can get the effect you’re aiming for, rather than just soaking fabric and hoping for the best.
And yes, you’ll likely get to see the larger vats they use for kimono-scale dyeing work. The whole point is to show you that this is part of a real production mindset, not only a demo for small items.
The 2-Hour Itinerary That Actually Matters
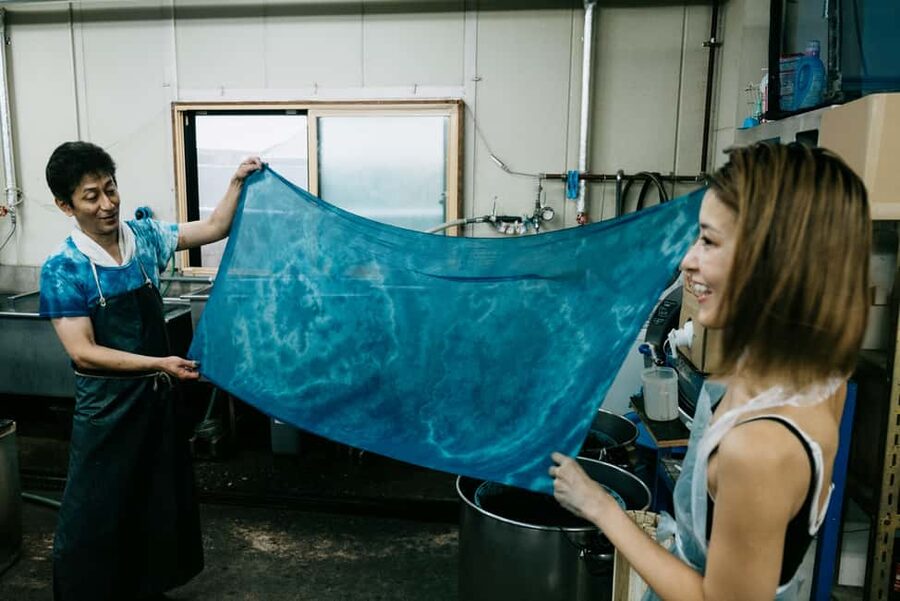
This workshop runs about 2 hours total. The pacing is built so you get context first, then hands-on time, then a calm finish.
Other Kyoto tours and experiences to compare


Welcome and studio tour (about 15 minutes)
You start with a warm welcome and a quick history of indigo in Japan. The host explains indigo’s symbolic role in daily life and how indigo dyeing fits into long-standing artisan routines. Then you walk through the working studio area—what tools look like, how the vats function, and why fermented indigo is treated differently than quick chemical dye.
Indigo dyeing workshop (about 60 minutes)
This is the main event. You dye your own cloth with guidance from local artisans. The studio provides equipment and workflow support, and you’ll do the folding and binding that create the resist pattern. Then you dip your fabric into the natural fermented indigo vat(s) and follow the handling steps that lead to the final blue result.
One helpful detail from the experience format: you’re outfitted to protect your clothes. Aprons, gloves, and shoe covers are used so you don’t accidentally stain your outfit. Still, you should expect the environment to be messy by craft standards, which is why you’re encouraged to wear casual clothes that can get dirty.
Tea and closing reflection (about 15–20 minutes)
After dyeing, you slow down. You’ll be served indigo leaf tea, and you’ll have time for questions, photos, and a look at what you made. This is also where the cultural layer shows up more clearly—stories, explanations, and a sense of what the artisans see in this practice beyond the final color.
Hands-On Help: What You Get From Artisans and Translators
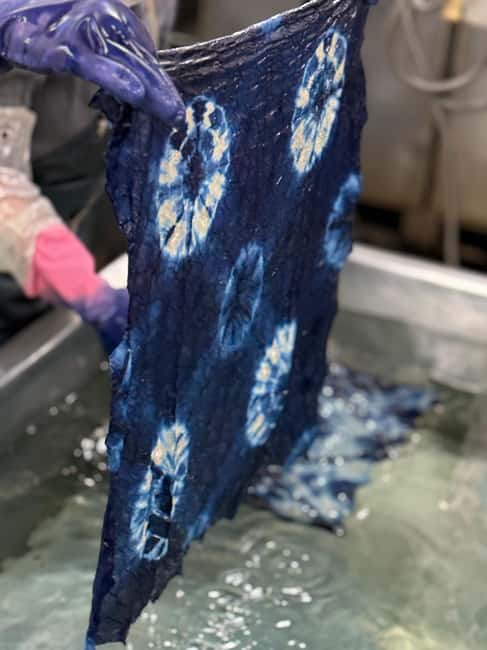
A natural indigo vat isn’t hard to touch, but it’s easy to mess up if you’re guessing. That’s where the small group matters. When you have up to 6 people, artisans can keep an eye on what each person is doing—especially during folding, binding, and dipping.
You also get bilingual support. The host (Chie is listed as the experience provider) supports English and Japanese communication. Translators like Sakura have been specifically praised for translating clearly and helping the master artisan’s guidance land in a way you can use. In practical terms: you’re not just receiving information. You’re getting help you can apply right away.
And because you’ll be working inside a real studio space, you’ll see the pride in technique. The staff are patient, and they guide you toward producing your best result rather than rushing you through.
Value for $95: What You’re Really Paying For
Let’s talk money honestly. At $95 per person for about 2 hours, this isn’t priced like a basic souvenir craft. It includes:
- All tools and materials needed for your dyeing session
- One included cotton furoshiki (about 45–50 cm)
- Use of the studio’s natural fermented indigo vats (sukumo)
- Hands-on guidance from local artisans
- Bilingual cultural interpretation (English/Japanese)
- Indigo leaf tea
- A small souvenir gift
- Photo time with your finished creation
So where does the value come from? In natural indigo work, the expensive part is not only labor—it’s the ongoing maintenance of the vats and the expertise needed to keep color consistent. You’re getting access to that working knowledge, plus guidance while you physically do the steps.
If you compare what you’d spend for similar “make-a-craft-item” experiences, this adds an authenticity factor that’s hard to fake: real working vats and a historic studio setup. You’re also taking home a finished piece made with a method that uses fermentation and oxidation, not a quick pigment process.
The one financial consideration: upgrades (cotton scarf, silk scarf, wool stole) cost extra on the day. If you want a larger, more wearable item, plan for that budget.
What to Wear and Bring So You Don’t Stress
This is hands-on dyeing. Your job is to show up comfortable and prepared.
What to bring:
- Comfortable shoes
- Comfortable clothes
- Clothes that you don’t mind getting dirty
You’ll be provided an apron during the dyeing process, plus protection like gloves and shoe covers. Still, natural dye environments can be unpredictable at the edges, and studio floors are traditional wooden planks.
Restroom access is available on-site. Wheelchair access is listed as not available, so mobility planning matters.
If you’re the type who loves photos, be ready to take them. The experience includes time for photos with your finished creation, and the studio has enough craftsmanship display to make pictures worth it.
Who This Indigo Workshop Fits Best
This is ideal for you if:
- You like crafts but prefer learning real process over watching a demo
- You’re interested in textiles, natural dyes, or the reasons indigo works
- You want a calmer small-group experience rather than a crowded class
- You’re traveling with kids or teens old enough to participate (the minimum age is 8+)
It’s also a good pick if you want a cultural element tied to technique. The host brings stories and context, and the studio tour sets the scene before your hands go into the vats.
It may not be the right fit if you want to dye a large garment, because the included item is limited (one cotton cloth). It also may not work well if you need wheelchair access, since it’s listed as not available.
Should You Book This Natural Indigo Private Atelier?
I’d book it if you want a Kyoto craft experience that feels like you stepped into someone’s real workday. The price makes sense because you’re not paying only for the final cloth. You’re paying for access to the studio environment, fermented indigo vats, and close help while you create.
Book this especially if you’re the kind of traveler who enjoys doing one small thing really well. The end result is something you can keep, wear, or gift. And the process teaches you something you won’t get from a quick hands-off workshop: indigo dyeing is patience, timing, and careful folding.
FAQ
How long is the natural indigo dyeing experience?
It runs about 2 hours, with a short welcome and studio tour, about 60 minutes of hands-on dyeing, and a tea-and-reflection closing.
What’s included in the $95 price?
The price includes tools and materials, one included cotton cloth (a furoshiki around 45–50 cm), use of natural fermented indigo vats (sukumo), hands-on guidance, bilingual cultural support in English and Japanese, indigo leaf tea, and a small souvenir gift.
What can I dye, and can I upgrade?
You’ll choose one item to dye as part of the workshop. Upgrade options mentioned include a cotton scarf, silk scarf, or a wool stole, paid for on-site.
Is there shipping for my dyed item?
Shipping is not included, but it may be available only upon request at extra cost.
What should I wear or bring?
Wear comfortable shoes and casual clothes that can get dirty. Even with aprons and protections, you should plan for the possibility of stains.
Is the workshop wheelchair accessible?
No, wheelchair access is listed as not available.
What languages are used during the workshop?
The experience includes English and Japanese support from a bilingual host and guide team.
More Private in Kyoto
More Tour Reviews in Kyoto
More Kyoto Workshops to Try
Just added: more Kyoto tours to browse



Kyoto Craft & Calligraphy Workshops, compared.
 ★ 5.0Chopsticks Making Workshop in Gion with Engraving OptionFrom $15958 reviews
 ★ 4.8Authentic knife making experience at a blacksmith in KyotoFrom $154350 reviews
 ★ 5.01-Hour Japanese Archery Experience in KyotoFrom $46176 reviews
 ★ 5.0Calligraphy class at Buddhist temple in city centerFrom $55167 reviews
 ★ 5.0Roketsu dyeing experience: M course Roketsu Dyeing ExperienceFrom $25163 reviews
 ★ 4.9Japanese Archery Workshop with Experienced InstructorFrom $38132 reviews
 ★ 4.8Japanese Calligraphy ClassFrom $5189 reviews
 ★ 5.0TAIKO, Japanese Drum Experience from KyotoFrom $11586 reviews
Browse the lists this tour appears in