
Your accessories can look like Kyoto art. In a 90-minute session near Nijo Castle, you’ll design something wearable two ways. You’ll also get to slip on a borrowed haori jacket and craft with traditional materials under patient, hands-on guidance.
What I like most is the freedom to choose your colors and parts, not just follow a preset pattern. You’ll be building a personalized accessory you can wear as a hair ornament or a brooch, so it works for both modern outfits and more traditional looks.
One consideration: this is a focused workshop, not a long cultural tour. If you want hours of sightseeing, you’ll need to plan your day around the 90-minute time slot.
In This Review
- Key highlights I’d plan around
- Kyoto Hair Accessories That You Can Wear Two Ways
- Where the Workshop Fits in Your Kyoto Day Near Nijo Castle
- The 90-Minute Flow: Haori Jacket, Materials, and Your Final Piece
- Materials That Make It Feel Truly Japanese (Not Just Cute)
- What You Get Back Home: Certificate, Souvenir, Tea, and More
- Pricing and Value: Is $80 for 90 Minutes Worth It?
- Practical Tips for a Smooth Session
- Who This Kyoto Craft Workshop Suits Best
- Should You Book This Kyoto Hair Accessory Workshop?
- FAQ
- How long is the Kyoto Japanese Hair Accessories & Brooch Workshop?
- How much does the workshop cost?
- What can I make in the workshop?
- What materials are used?
- Is a haori jacket included?
- What’s included besides the crafting?
- Is the workshop family-friendly?
- Where is the workshop located?
Key highlights I’d plan around
- 2-way wearable design: hair ornament or brooch, so you get more use from one creation
- Traditional materials: washi paper, mizuhiki cords, origami, and artificial Japanese flowers
- Haori jacket rental: you’ll style your piece and fit the moment
- Photo time with your outfit: practical, fun, and great for saving the memory
- Keepsakes included: certificate of completion plus a handmade souvenir
- Tea and sweets included: a gentle reset after the crafting
Kyoto Hair Accessories That You Can Wear Two Ways
This workshop is for anyone who’s tired of buying souvenirs you can’t use. The big idea is simple: you’ll make a one-of-a-kind accessory that can function in two roles—a hair ornament or a brooch. That matters in real life. If you’re touring all day, you might want it in your hair for temples and streets; in the evening, you can pin it to a bag, jacket, or scarf.
The creative payoff is that you’re not limited to one look. You choose your preferred colors and materials, then build a piece that should match your style. Even if you don’t consider yourself artsy, the structure of a guided workshop keeps things calm. You’re making something traditional with clear steps, while still having enough choices to feel ownership over the final result.
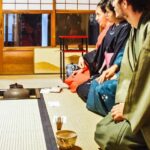
And yes, you get to wear a borrowed haori jacket during the session. That’s not just for photos. It helps you understand how the accessory fits into Japanese styling. The jacket gives you a built-in “outfit moment,” so the accessory doesn’t feel like a random craft project—you’re creating a wearable look.
One more practical plus: the workshop includes time for a photo session with your creation and outfit. It’s a small detail, but it saves you from scrambling afterward to get a decent shot outside in a busy area.
Other Kyoto tours and experiences to compare

Where the Workshop Fits in Your Kyoto Day Near Nijo Castle
The workshop sits in central Kyoto, near Nijo Castle, and it’s described as a short walk from the UNESCO World Heritage site. That location is smart. You can pair this with a planned stop at Nijo Castle, then head onward to nearby districts you’ll likely want anyway—Gion, Arashiyama, Kawaramachi, and Karasuma are all accessible from the area.
Here’s how I’d plan your timing. Book this earlier in your day if you want a calm reset after temple walking. Or do it later if you want an indoor break before dinner and evening strolls. Because the activity is 90 minutes, you don’t lose a whole day—but you do get a full, satisfying craft experience without feeling rushed.
One thing to keep in mind is that central Kyoto can be crowded at peak times. The workshop being a short walk from Nijo Castle means you’ll likely arrive on foot and then get settled quickly. Wear comfortable shoes and keep your camera handy. You’ll be moving through a crafting space, trying on the haori, and then staging photos.
This is also a good “pause” activity if your group has mixed interests—some people want sights, others want something hands-on. A craft class gives everyone a shared goal, and you can still split off afterward.
The 90-Minute Flow: Haori Jacket, Materials, and Your Final Piece
The rhythm of this workshop is exactly what makes it work: it’s long enough for a meaningful result, short enough that you don’t feel exhausted. In practice, you’ll spend the 90 minutes designing, crafting, and finishing your accessory.
First comes settling in and getting oriented. You’ll be working in a guided setting with professional instruction from a teacher who’s described as kimono-clad. The instruction is available in English and Japanese, which helps a lot if you’re not comfortable with Japanese-only explanations.
Then you’ll move into the creative choices. You’ll select materials and colors, and the workshop uses traditional components like washi paper, mizuhiki cords, origami, and artificial Japanese flowers. Even if you’re not sure what those elements look like combined, the structure of the lesson keeps you from guessing blindly.
Next is the build stage: crafting your one-of-a-kind accessory. You’ll follow the teacher’s guidance while still making decisions about the look. This is where the experience feels most personal. You’re not just assembling; you’re shaping the aesthetic—choosing how the piece reads visually when worn.
After you finish, there’s a photo session with your accessory and outfit. This part is genuinely useful. People often think they’ll remember how it looked after they take it home. The class gives you a built-in moment to capture it in a way that matches the haori styling.
Finally, you’ll wrap with included extras: a certificate of completion and a handmade Japanese gift in addition to your own creation. Then you’ll slow down a bit with Japanese tea and sweets, which turns the workshop into more of a memory than a quick transaction.
Materials That Make It Feel Truly Japanese (Not Just Cute)
A lot of craft experiences slap the word Japanese on the materials, but here the materials listed are specific and traditional. That’s the difference between a generic souvenir and something with cultural texture.
You’ll work with washi paper, which is a classic Japanese paper. In a small accessory, it can create crisp color and light texture without needing heavy tools. You’ll also use mizuhiki cords, which are often linked with Japanese decorative knotting. Even if you don’t know what mizuhiki is before you arrive, the workshop guides you through how it contributes to the final look.
Then there’s origami and artificial Japanese flowers. Origami brings an iconic folded form, while artificial flowers add dimension and a soft, decorative vibe. The combination matters because it lets your piece feel layered. It’s not flat. It’s built to look good from multiple angles—especially when pinned or placed near the face.
The practical upside? These materials are suited for a short, structured class. You’re not dealing with complicated equipment. You’re working with components that can be shaped and assembled within a 90-minute window, with expert guidance.
And since you choose your colors and materials, you can aim for very different moods: subtle and elegant, or bold and playful. The class is set up so your choices show in the final result rather than disappearing into someone else’s template.
What You Get Back Home: Certificate, Souvenir, Tea, and More
This workshop is not stingy with included items. It’s priced at $80 per person, and the value comes from what’s wrapped into that fee—not just the materials you use.
You’ll receive:
- Your completed accessory (wearable as hair ornament or brooch)
- A certificate of completion
- A handmade Japanese souvenir gift in addition to your own piece
- Japanese tea and sweets
That certificate detail might sound small, but it’s a meaningful touch. It gives you something to keep that’s tied to the effort you put in. It also works as a memory anchor if you plan to collect other Kyoto experiences and want a consistent way to track them.
The handmade souvenir gift is also a nice bonus. It turns the experience into a two-way swap: you craft something, and you leave with something crafted for you. That’s how classes feel more personal.
And the tea-and-sweets moment is not just a snack. After you’ve been focused on choosing colors, arranging parts, and following instruction, it gives you a gentle landing. It’s also a comfortable way to ask questions and slow down before you head back out.
If you’re traveling with someone who thinks craft classes are only for kids, the included tea and photo session usually changes their mind. It becomes a proper activity, not a rushed “make and go.”


Pricing and Value: Is $80 for 90 Minutes Worth It?
Let’s be honest about the math. $80 for a 90-minute workshop can feel like a lot—until you look at what you actually get for that time.
You’re not paying just for instruction. You’re paying for the full material set, including traditional components like washi paper, mizuhiki, origami elements, and decorative materials. You’re also getting haori jacket rental, which is part of the experience design (and not something you’d usually rent just for an outfit photo).
Then you add the included extras: your accessory, a certificate, a handmade souvenir gift, and Japanese tea with sweets. Those pieces collectively turn the class into a complete package.
So who is it worth it for? I’d say it’s great value if you:
- Want a wearable keepsake instead of another bag-stuffed memento
- Enjoy small, guided craft steps (not just watching)
- Like the idea of designing something that can be used as a hair accessory or pinned to clothing
- Are traveling solo, as a couple, or in a group and want a calm shared activity
It’s less ideal if you’re the type who hates hands-on tasks or you’re mainly chasing big sights. In that case, you might feel the time is too short for your expectations. But if you want something personal that looks Japanese and you can actually wear later, the price is easier to justify.
Practical Tips for a Smooth Session
To get the most out of the workshop, come prepared for a comfortable, hands-on 90 minutes.
Here’s what helps:
- Bring a camera so you can capture your accessory in the haori look
- Wear comfortable clothes since you’ll be crafting and trying on the jacket
- If you’re going with kids, use the kid-friendly version of the workshop option, which is available
- If you care about photos, plan to spend a little time staging them during the photo session rather than rushing
Instructor support also seems to be a strength. In recent sessions, the class quality showed through with names like Mikiko-san, who was described as kind and patient, and Ayumi-san, who also stood out for kindness while teaching a mother and daughter. That’s a good sign because craft workshops can fall apart if the guidance is unclear. Here, the instruction is described as polite and explained well.
Language is another practical benefit. You can get instruction in English or Japanese, so you’re not forced to rely on guesswork to complete the accessory.
Who This Kyoto Craft Workshop Suits Best
This workshop fits a wide range of travelers because the experience is structured and the output is tangible. I’d especially recommend it if you:
- Want a meaningful souvenir you’ll actually use
- Are traveling in a couple and want something romantic and quiet
- Are solo and want a low-pressure social setting with guidance
- Are a family group looking for a child-friendly option
- Like the idea of learning a bit of Japanese aesthetic through materials and styling
It’s also a smart choice if your Kyoto days include temple visits and neighborhood walks and you want one activity that’s slower, calmer, and done at your own creative pace.
Should You Book This Kyoto Hair Accessory Workshop?
Book it if you want a wearable Kyoto memory made with traditional materials, guided by a teacher, and returned to you as something you can show off on your trip and keep afterward. The included haori jacket rental, certificate, and tea with sweets make it feel like a full experience, not just a class.
Skip it if you’re hoping for a long sightseeing-style tour or you don’t enjoy hands-on crafting. This is about making, finishing, and styling your accessory, not about hours of walking and history stops.
If you’re on the fence, choose this when you’re planning a day near Nijo Castle. That location makes it easy to weave the workshop into a Kyoto itinerary without adding complicated travel.
FAQ
How long is the Kyoto Japanese Hair Accessories & Brooch Workshop?
The workshop lasts 90 minutes.
How much does the workshop cost?
The price is $80 per person.
What can I make in the workshop?
You’ll create a unique accessory that you can wear as either a hair ornament or a brooch.
What materials are used?
You’ll use traditional materials such as washi paper, mizuhiki cords, origami, and artificial Japanese flowers.
Is a haori jacket included?
Yes, you can rent and wear a haori jacket during the workshop.
What’s included besides the crafting?
It includes a certificate of completion, a handmade souvenir gift, and Japanese tea with sweets.
Is the workshop family-friendly?
Yes. Children are welcome, and there is a kid-friendly version of the workshop available.
Where is the workshop located?
The workshop is near Nijo Castle in Kyoto, in central Kyoto.
More Workshops in Kyoto

More Tour Reviews in Kyoto
Just added: more Kyoto tours to browse






Workshops, compared.
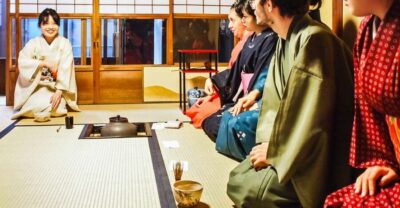 ★ 4.345-Minute Tea Ceremony Lesson ExperienceFrom $222,378 reviews
 ★ 5.0Ramen Cooking Class at Ramen Factory in KyotoFrom $1311,937 reviews
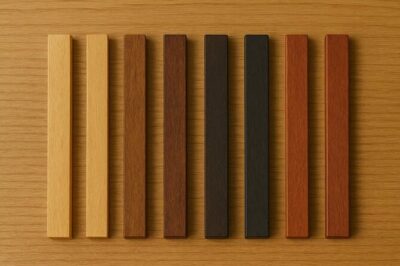 ★ 5.0Chopsticks Making Workshop in Gion with Engraving OptionFrom $15958 reviews
 ★ 4.9Samurai Sword Class by Experts in Traditional ArtsFrom $64657 reviews
 ★ 4.9Ramen Cooking Class at a Ramen Factory with SouvenirFrom $127532 reviews
 ★ 5.0Ninja 1-hour Hands-on Lesson by Japanese master in Kyoto -EntryFrom $80489 reviews
 ★ 5.0Ramen, Gyoza, and Onigiri Cooking ClassFrom $90445 reviews
 ★ 5.0The Original Small-Group Sushi Making Class in KyotoFrom $69436 reviews
Browse the lists this tour appears in