
Reviewed · KYOTO CRAFT & CALLIGRAPHY WORKSHOPS
Roketsu dyeing experience: M course Roketsu Dyeing Experience
Wax and dye in Kyoto, with your own design.
This Roketsu workshop is interesting because you draw by yourself and then do the dyeing too, using a wax-resist bucket-dye method. It is hands-on Japanese craft, not a quick photo stop.
What I like most is the control you get over the final look, whether you pick a pattern or create your own. I also like the pacing: you get patient guidance from the proprietor and his mother Yoko, and the whole setup feels calm, more like making than rushing.
One thing to consider: English support can be limited, so if you want very detailed back-and-forth explanations, you may feel a bit stuck. Also, the suggested 90 to 120 minutes can stretch if you choose a more intricate design.
In This Review
- Key takeaways before you go
- Roketsu dyeing in Kyoto: what makes it different
- What you’ll make: t-shirts, totes, and original designs
- The Roketsu process: drawing, wax resist, and bucket dyeing
- Choosing your design without getting overwhelmed
- The studio vibe: patient teaching and calm pacing
- Timing that actually fits your day (and why it sometimes runs long)
- Location and getting there from central Kyoto
- Price and value: what $25.77 buys you
- Who should book this Roketsu workshop
- Should you book Roketsu73’s dyeing experience?
- FAQ
- How long is the Roketsu dyeing experience?
- What is the price per person?
- What items can you dye in the workshop?
- Can I use my own sketch to make an original design?
- Do I need drawing skills to participate?
- Can I take my dyed item home the same day?
- Where do I meet for the workshop?
- Is it a small group?
- Is there an English guide?
- What if the weather is bad?
Key takeaways before you go
You draw, then you dye using a wax-resist bucket-dye process
Stencils are plentiful, but freehand is possible if you want an original work
You take your item home the same day after the dyeing happens
Expect a slow, soothing workshop vibe with help from the studio’s family team
Plan for extra time if you go detailed or want extra drawing practice
Roketsu dyeing in Kyoto: what makes it different
Kyoto has plenty of crafts, but Roketsu dyeing is one of the more satisfying ways to do one yourself. The key idea is simple: you create a design, then you use wax as a resist so the dye only lands where you want it. In practice, that means your artwork isn’t just printed onto fabric. It is made through a real process with real reactions—often the part that makes the results feel special.
This is also a full “maker” experience instead of a demo you watch. You pick what you will dye—commonly things like a t-shirt, tote, or a hanging-style piece—and then you go through the steps from drawing to wax painting to dyeing. The workshop is set up for people with different skill levels, so even if you do not consider yourself artistic, you still get a product you can be proud to bring home.
Finally, the studio is the kind of place where you can hear what is going on. It is not buried inside a tourist mall. You are working in a space that feels like a small family workshop, which makes the whole day feel more grounded.
Make something by hand in a Kyoto workshop
What you’ll make: t-shirts, totes, and original designs
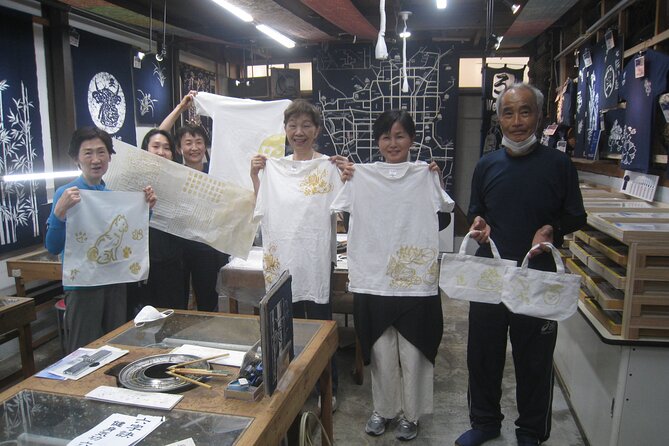
Your finished piece is the payoff. You leave with a dyed item that matches your design choices, and that is a big value point for a relatively low price. The workshop commonly supports wearable and display items, and you can usually choose between things like a t-shirt, tote bag, or a hanging banner-style textile.
When it comes to design, you get options:
- You can select from a large library of patterns and styles (often described as dozens or even hundreds of stencil choices).
- You can create a design from your own sketch if you bring one (or combine multiple draft ideas in a way that becomes your own original layout).
- You can also do a freehand approach, depending on what you pick and how you want to work.
That mix matters. If you want an easy path, you can lean on the existing patterns. If you want something more personal, you can steer the process toward your own concept. Either way, the dyeing method rewards careful layout, so even your first attempt can look like artwork instead of a classroom craft.
The Roketsu process: drawing, wax resist, and bucket dyeing
The heart of this workshop is the Roketsu technique and the wax-resist approach. Here’s what you should expect as you move through the day.
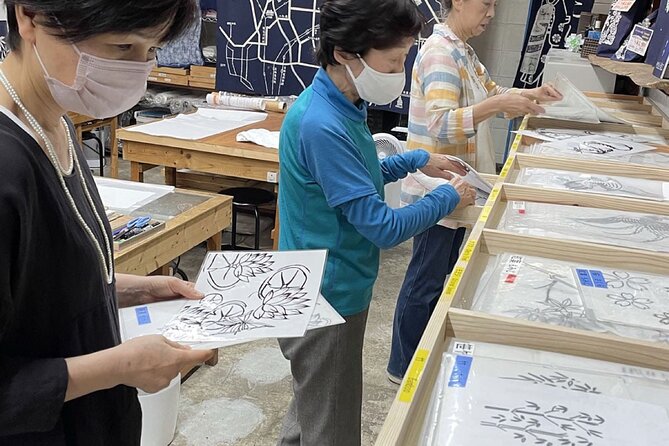
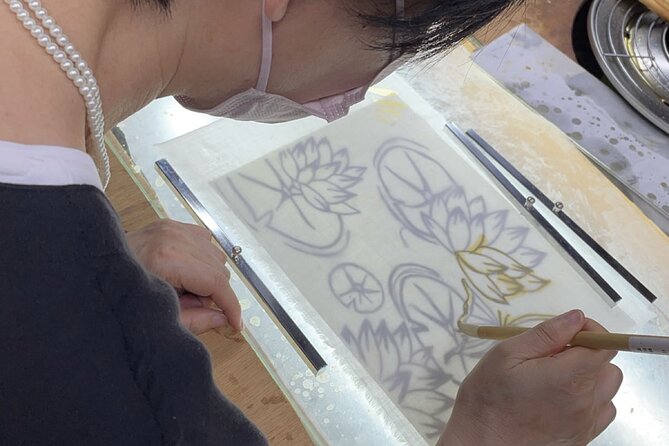
First comes the design phase. You choose a pattern or you develop your own. There is time for drawing, and you are guided in how to translate your design onto fabric. Some people also do a small practice run on a small piece of cloth first, which helps you understand how the wax lines look before committing to the final item.
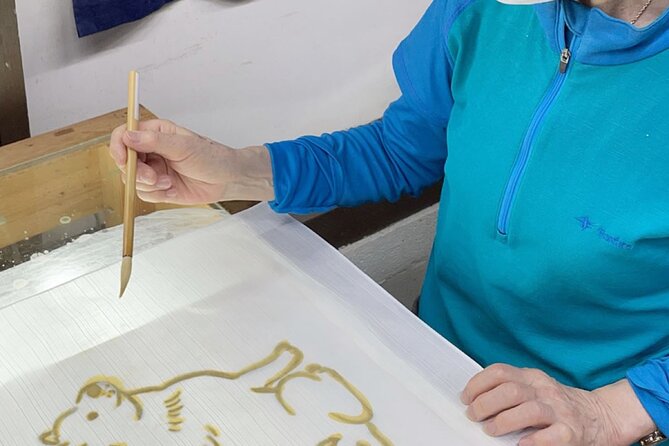
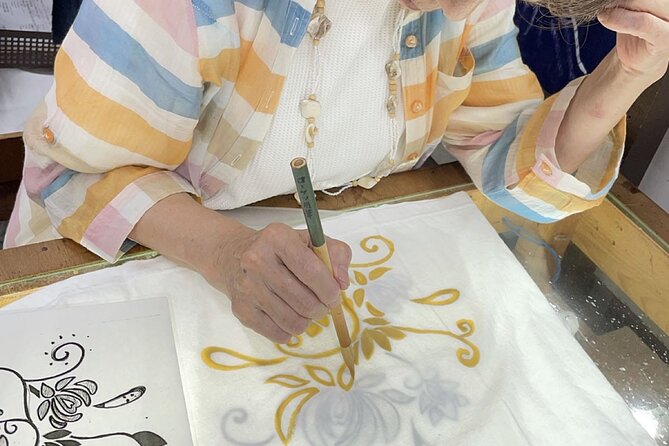
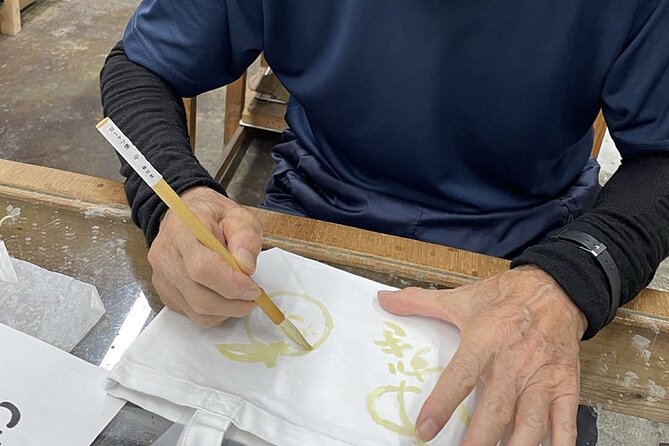
Then comes the wax painting. You paint melted wax onto the fabric along your design lines. This is not just messy fun; it is the step that determines where dye will go and where it will not. The wax acts like a barrier, so after dyeing, the waxed areas resist the color and create those signature Roketsu lines and shapes.
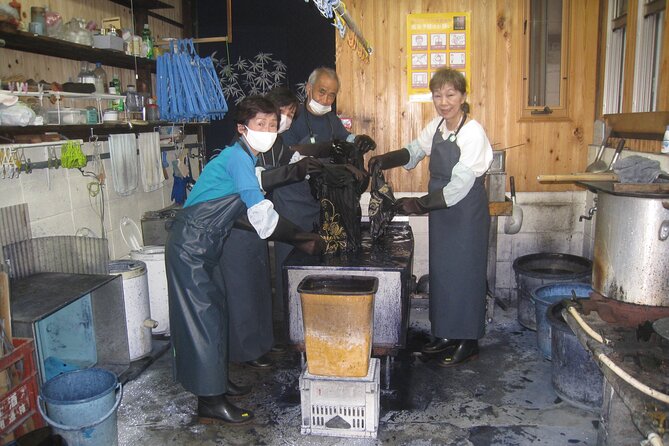
Finally, the bucket dyeing happens. The workshop emphasizes “100% bucket dyeing,” meaning the dyeing is done through the bucket-style immersion rather than a quick surface application. That is part of what you’re paying for: you get a genuine process that produces a real textile result, not just a painted effect.
When the dye stage is complete, your item is handled so it is ready to take home the same day. You end up with a souvenir that looks like something you made in a studio, not something you bought off a rack.
Choosing your design without getting overwhelmed
Design choice is where this experience can either feel easy—or feel like it is too much. The studio provides lots of stencil options, so if you want a low-stress plan, start by picking a style first, then narrow down to the specific pattern.
A practical tip: think about contrast. Wax resist works best when your design has clear separation—areas that will be blocked by wax and areas that will be exposed to dye. If you choose something that is very fine with lots of tiny details, you may love the look, but you also need more time and careful wax lines.
If you bring a sketch, you can make something that feels like your own. That can be as simple as adapting a drawing into a more dye-friendly layout, or as detailed as combining multiple drafts into one cohesive design. Either way, you will still be working within the workshop’s technique, so your final piece will look like an original artwork shaped by the process.
If you do not bring a sketch, you are not stuck. You can still pick from the pattern library and receive guidance on how to execute it. And because people of different experience levels do the class, you do not have to master drawing first—you just have to follow the wax-resist logic.
The studio vibe: patient teaching and calm pacing
One of the most praised parts of this workshop is how it feels to do it. The teaching style is gentle and unhurried. You are shown what to do step-by-step, and you are not pushed out the door the moment the clock hits.
In particular, the studio’s family team includes the proprietor and Yoko, who help with guidance throughout. This matters because Roketsu dyeing has a few technique moments where small adjustments can improve the outcome. Having someone nearby to help you interpret the process can make your work look sharper without taking away your creative control.
Also, the studio setup is comfortable and clean, which might sound obvious, but it really changes how enjoyable the experience is. A sitting, focused craft day is a welcome break when your Kyoto trip has been mostly standing, walking, and rushing from temple to temple.
There is also a “therapeutic” feel to it. Wax painting is repetitive in a good way, and the dyeing step adds a sense of waiting and anticipation. If you want an activity that helps you slow down, this is one of those choices.
Timing that actually fits your day (and why it sometimes runs long)
The workshop is listed around 2 hours, and the full journey is often described as about 90 to 120 minutes. That can work perfectly if you pick a simpler pattern and keep your drawing phase focused.
But you should plan for the real-world version: if you go more intricate, you may spend longer. Some people take extra time just on the drawing stage, and they end up staying closer to 3 hours total. The good news is that you typically do not feel rushed—your time expands because the design work takes time, not because the workshop is mismanaged.
So here is a simple planning rule:
- If you have a hard next booking, choose a relatively straightforward design.
- If you want a relaxed craft break, give yourself a wider window and let the experience set your pace.
Also remember the workshop requires good weather. If weather is poor, it can be canceled and you may be offered a different date or a full refund. That means you should try not to schedule it as your only plan on your most time-sensitive day.
Location and getting there from central Kyoto
The meeting point is Roketsu73 Nishikyōgoku Umazukachō, Ukyo Ward, Kyoto, 615-0885, Japan, and the activity ends back there. It is in the Kyoto outskirts, so it can feel quieter than the busiest tourist zone.
It is also near public transportation, which is helpful if you want to avoid a complicated route. The workshop uses a mobile ticket, which usually keeps check-in smooth and reduces paper handling.
Because it is outside the core sightseeing lanes, I suggest pairing it with either a lighter morning or a slower afternoon. This is not the kind of activity you want to squeeze between back-to-back long walks unless you are fully committed to making it happen.
Price and value: what $25.77 buys you
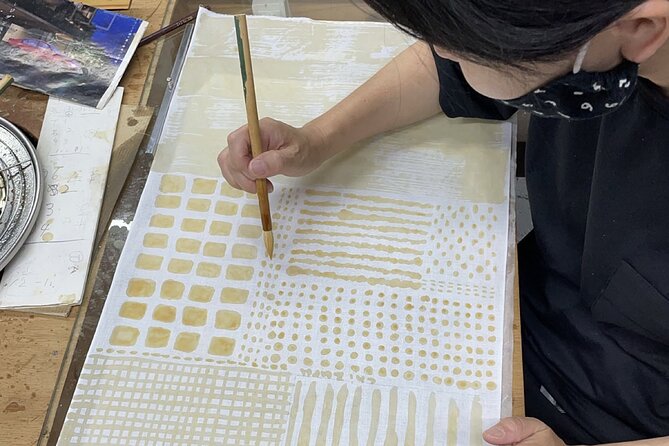
At $25.77 per person, this class is priced like an accessible craft activity, not a premium atelier tour. The value comes from what you actually take home and how much making time you get.
You are paying for:
- instruction through a real wax-resist process
- hands-on time for drawing and wax painting
- dyeing done through bucket-style immersion
- a take-home item completed the same day
When you compare that to buying a pre-made textile souvenir, the difference is the personalization and the process. You get to choose the design style, do the wax work yourself, and watch the dye stage create the final look. Even if your drawing is not perfect, the craft method makes it feel like a real artwork, not a generic souvenir.
It is also a good bargain if you want one culturally rooted activity that still feels relaxing. Kyoto can be intense. Paying for a calm studio session that produces a wearable memory is one of the smarter budget choices you can make.
Who should book this Roketsu workshop
This workshop fits best if you want a hands-on cultural activity and you value the souvenir being personal.
You’ll likely enjoy it if:
- you want a break from heavy walking and constant sightseeing
- you like crafts, even if you are not confident with drawing
- you want something to wear or hang at home that you made yourself
- you are traveling as a solo traveler, a couple, or a family and you want everyone to disconnect for a bit
You may want to reconsider if:
- you need lots of detailed English explanation and you get frustrated by a language barrier
- you have a very tight schedule with no buffer for drawing time
- you are planning your day around uncertain weather
The group size is capped at 30, which helps keep it manageable and supports the “you are guided” feel.
Should you book Roketsu73’s dyeing experience?
If you want one Kyoto activity that is practical, calm, and genuinely hands-on, I think this is a strong yes. The main reason is straightforward: you end up with a one-of-a-kind dyed item you made through a real technique, and the workshop rhythm is designed so you do not need advanced art skills.
Book it especially if you like the idea of wax-resist dyeing and you want a souvenir with your own design choices. If you’re the type who gets impatient with slow crafts or you strongly prefer strong English narration, go in with the mindset that this is a learn-by-doing workshop. Bring a sketch if you want maximum originality, or pick a stencil if you want a simpler path.
FAQ
How long is the Roketsu dyeing experience?
The experience is about 2 hours for most bookings, and the full journey is often described as roughly 90 to 120 minutes.
What is the price per person?
The price is $25.77 per person.
What items can you dye in the workshop?
You can typically dye items like a t-shirt, tote bag, or a hanging-style textile, depending on what you choose in the studio.
Can I use my own sketch to make an original design?
Yes. If you have your own sketch, you can create original works using your design.
Do I need drawing skills to participate?
No. Most travelers can participate, and the workshop provides hands-on guidance so you can still get a good result even without strong art skills.
Can I take my dyed item home the same day?
Yes. The workshop says you can take your work out on the day, around 90 to 120 minutes, and people also describe leaving with their completed item.
Where do I meet for the workshop?
The meeting point is Roketsu73 Nishikyōgoku Umazukachō, Ukyo Ward, Kyoto, 615-0885, Japan, and the session ends back at the same meeting point.
Is it a small group?
The workshop has a maximum of 30 travelers.
Is there an English guide?
English support is limited. You will still get hands-on instruction, but you might need to rely on demonstrations and visual cues at times.
What if the weather is bad?
The experience requires good weather. If it is canceled due to poor weather, you’ll be offered a different date or a full refund.
More Tour Reviews in Kyoto
More Kyoto Workshops to Try


Just added: more Kyoto tours to browse


Kyoto Craft & Calligraphy Workshops, compared.
 ★ 5.0Chopsticks Making Workshop in Gion with Engraving OptionFrom $15958 reviews
 ★ 4.8Authentic knife making experience at a blacksmith in KyotoFrom $154350 reviews
 ★ 5.01-Hour Japanese Archery Experience in KyotoFrom $46176 reviews
 ★ 5.0Calligraphy class at Buddhist temple in city centerFrom $55167 reviews
 ★ 4.9Japanese Archery Workshop with Experienced InstructorFrom $38132 reviews
 ★ 4.8Japanese Calligraphy ClassFrom $5189 reviews
 ★ 5.0TAIKO, Japanese Drum Experience from KyotoFrom $11586 reviews
 ★ 4.7Japanese Calligraphy WorkshopFrom $3284 reviews
Browse the lists this tour appears in